Here in our great wide land, we have some of the most amazing animals in the world. Some are cute and cuddly and some are deadly, and most fall somewhere in between. It is often these “in-betweeners” that cause us the most annoyance. Spiders, mosquitos, flies and all manner of creepy crawlies seem to love our homes as much as we do.
Although there are many products and wives’ tales to help banish pests from your home, perhaps the simplest is to form a barrier to entry in the form of window screens.
Screened windows are popular for the fact that you can allow cooling breezes in while keeping those nasties outside where they belong.
But, as simple as it sounds to install screens, there are some factors to consider.
What are you looking to deter?
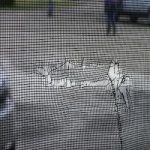
Standard flyscreens will certainly keep out flies, moths, and other larger bugs, they may not be as effective in preventing smaller insects such as midges or sandflies. Similarly, if you have cats or dogs, you might find that standard flyscreen may get torn or ripped from paw attacks.
Remeshing your damaged screens is a simple DIY job that need not involve a lot of time or money.
At Restock Direct, we can supply you with Trade Quality Standard Mesh, Finer Midge Mesh or Tougher Pet Mesh.
By choosing the right mesh for your situation, you can be assured to have a comfortable summer, no matter how many bugs are around.
Follow these easy steps to repair your flyscreens in no time:
Tools Needed
- Narrow tipped flat screwdriver
- Tape measure
- Spline roller and Stanley knife
- Screen mesh
- Spline (you may be able to reuse the existing spline)
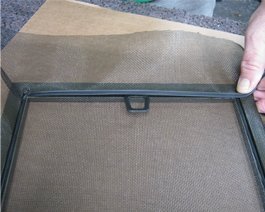
Step 1: Remove the Old Mesh and Measure the frames
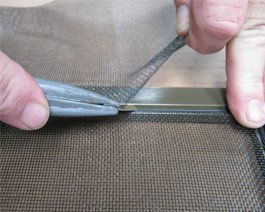
Starting at a corner of your screen, gently pry the rubber spline from the frame groove. You may be able to reuse this spline if it is in good condition. Otherwise, be sure to purchase new spline from our store when you order your mesh. Run the screwdriver around the groove once more to remove any dust or dirt that might prevent the new mesh and spline from seating correctly back in place. Measure your existing window or door and cut the flyscreen mesh to fit, leaving about a 50mm overhang on all four sides.
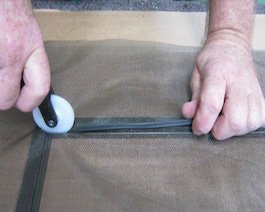
Step 2: Installing the Mesh
Now, it’s time to fit the mesh to the frame. Lay the mesh over the frame starting with a short side. Tack the spline into the frame at the ends and the middle using the spline roller, before running it along the entire length. This will stop the mesh from bunching up. Repeat this step for the longer side, and then work your way around the frame until all the mesh is in place.
Cut off the excess spline and trim the mesh with a Stanley knife.
Handy tip 1: It is good to have a second pair of hands to keep the mesh taut while you are fixing it to the frame.
Handy Tip 2: Leaving the mesh in the sun to soften slightly may make it easier to manoeuvre. This is especially true for heavier Pet Mesh.